Showing posts with label Terrain. Show all posts

Tuesday, January 29, 2013

Digging in

There are no sapper or miner figures available for the Allied forces. As far as I can tell the 1815 campaign employed civilians to conduct any entrenchment work on the Allied side,  not that much was done an any of the battles.

I found some suitable figures from the Pendraken range - some generic 19thC civilian working party FPX1. There are two sculpts in the 15 figure packet -  a pick axe and a shovel. The figures are working in plain clothes, not uniforms, making them suitable markers for any army.

I mounted them in threes on a standard infantry base, added some ballast and flock and a few bigger rocks. All done.


Sunday, January 27, 2013

Review of 4Ground's 15mm walls

Packet contents of the 15mm walls
I picked up a packet of 4Ground's 15mm walls at Cancon yesterday. I had been eying them off on their website, but waited to see them to check the sizing for 10mm, before buying a packet. The detail looked impressive on the packet, they use a laser to etch the MDF sheets.

In the packet there are three sheets - 2 wall sets, a base set and a clear set of photo instructions. The sheets are 2mm thick MDF. The walls are etched on one side with a rough stone pattern. Some of the walls have removable sections for a ruin or damaged effect. You glue two sections of walls back to back to make a 4mm thick section, the glue it onto the base.

The base has been burnt to a dark brown, looking like earth, removing the need to paint, although you can if you wish. The laser etching on the brick work leaves a dark brown mortar line. The bricks are a buff colour. I thought about painting the bricks, but liked the look as they were, so left them. You could seal them.
Scale of the pieces with some Redline figures in the background

The pieces popped easily out of the frame with only a small attachment point. I didn't trim them as they seemed not too noticeable. The laser seals the edge and makes it a nice dark brown, you don't need to paint this. All the pieces fitted together firmly.

They have a clever way of doing the bases which allows walls to be joined up without needing T pieces or corner sections.

After glueing the pieces together, I added my usual coloured ballast base mix and some flock. On some of them I put glue on the walls and used coloured flock to simulate bushes and vines growing over them. The whole process of assembly and flocking took about an hour.

In the box you get just over 1.5m of walls which is very good value. There are
More scale shots, Redline Jaegers and an Old Glory Office


  • 12 x 60mm wall sections
  • 4 x 60mm damaged wall sections
  • 2 x 60mm large gate sections
  • 2 x 60mm small gate sections
  • 8 x 30mm wall sections
  • 4 x 30mm damaged wall sections


One packet is certainly enough to dress up a battlefield, two if you have lots of built up areas. I would even consider getting some to cut up to add to building bases.

While walls are not too hard to scratch build, I was impressed at the speed it took to get a quality item onto the table. It would have taken me many more hours to achieve this.

The quality of the walls is excellent. 4Ground seem to be adding lots of new products all the time. They have some very nice pre-painted kits for 28mm and 15mm.

I have asked if they could start a 10mm line with some accessories (wheels, walls, carts), some European style buildings or kits to add to foam blocks (doors windows, roofs). They seem interested but need a number of requests to start something new. If you are interested in 10mm stuff and like the look of their products, please write to them and encourage them to do some good work. I can see some very nice flat packed village sets for Russia or Belgium or Spain, or some walled farm kits. They are cheap to post, easy to make and look great on the table.

For more information see their website at www.4ground.co.uk

Finished section
Glued together

Closeup of the double gate

Basing ballast added


Wednesday, September 26, 2012

Old Maps - 1815 Campaign

George Hooper's excellent 1889 book "Waterloo - the Downfall of the first Napoleon" had five beautifully drawn maps in the end of the book. In online scanned copies of the book, these have been omitted or badly done. I could not find any decent copies of the maps online. I have scanned them in so others may see the elegant plates on different aspects of the campaign.

Click for larger versions of the maps. They are scanned in at 300dpi so they print out quite well, the detail is very clear. There are some blemishes on the original plates, but I think they add to the look. Hopefully they are some use to people.

General Map of 1815 campaign area
Ligny
Quatre Bras between 4pm and 5pm
Waterloo at 11am
Waterloo 5.30pm

Saturday, September 8, 2012

Napoleon's Carriage

Napoleon abandoning his carriage
During Waterloo, Napoleon's personal carriage was kept at the back of the battle guarded with the other baggage by a battalion of Foot Chasseurs of the Guard. Despite the picture on the left of a defeated Napoleon abandoning his carriage, Napoleon didn't ride away in his carriage after Waterloo. Marchand ordered it to be taken back to avoid capture. Napoleon eventually took one of Marshal Soult's carriages that was left near Genappe.

The carriage itself was captured in the rout after the battle of Waterloo on the 18th June, by Prussian Major von Keller. It was the later acquired by an Englishman William Bullock who put it on exhibition in London to the fascinated public. Later in 1842, the carriage was acquired by Madame Tussaud and was displayed for the next 80 years. Unfortunately in 1925 it was completely destroyed in a fire.

Pendraken's 17th/18thC Carriage
Made in April 1815, it was superby crafted. The interior could be made up to be a bedroom, office, bathroom, dressing room or dining room. It had many secret compartments and clever storage areas where the Emperor's personal effects, maps and some treasure was kept.

There are not a lot of options in 10mm to model this unusual objective piece. Pendraken make an 17th/18th Century Carriage as part of their Seven Years War range. There are not any pictures on the website or the forums or anywhere really, so I took a chance and ordered it to see if it would be suitable.

The kit comes with 4 horses, the carriage and separate wheels, a chest and sack and a driver in 18th C clothing (tricorn, big cuffs, heavy cloak). The carriage itself needed no modification being close enough, other than painting. There is not too much detail on the carriage, it seems pretty generic.

Carriage undercoated

I decided that the driver needed to be converted to having a bicorne and imperial livery. The large cuffs were trimmed down and the tricorne cut off. Bit of green stuff later and ready to prime.

The rest came together pretty well, a bit over an hour and it was all done and based. I used a  spare Chasseur a Cheval of the Guard as an escort. I am not sure about the N on the side, I might paint over it later, my attempt at an eagle was pretty poor. The carriage will make a good objective is the post Waterloo scenarios.


The carriage with escort


Driver sporting a new Bicorne

Tuesday, September 4, 2012

Flocked Felt Fields by Hotz Mats

I recently bought three packs of flocked felt fields from Eric Hotz at Hotz Mats to spruce up the terrain options. Fields are often a part of Napoleonic battle fields. For instance, a feature of the Quatre Bras battle field was the rye fields south of the crossroads.

I had difficulty finding some nice looking options for 10mm, I had some adequate ones made from synthetic grass. The teddy bear fur I tried was too long for 10mm, ok for 28, but not right for 10mm. I had been struggling to find exactly the right kind of door mat, that was plain brown and a rubber base.


Contents of 3 Field kits
The pictures on Erics sites looked very appealing, and the reviews were positive, so I ordered three packets of the 6mm - 15mm version. There is a discount for three packets (only $14USD each) and the postage was the same for one or three packets.

The 6mm - 15mm pack contains 6 fields in 3 different sizes. I ended up with 20 fields between the tree packs, totalling an area of 900mm x 600mm (36" x 24"). The ground scale I use is 1mm - 1 yard, so that is a lots of country under cultivation. The smallest field was 100mm x 100mm and the largest 250mm x 200mm.

They come in different colours - green, brown and a yellow which look realistic at a distance. The field is made of a matted fabric with the furrows made with flock glued on. Eric say that they are treated with a sealer to make sure it stays together. They look and feel very durable. The instructions say they can be ironed flat, but it wasn't necessary with the ones I received.
Summer fields of Belgium


They seem to stick nicely to the static grass mat, like a very light velcro feel, and conform nicely to contours. I like the flexibility they give to designing layouts.

Eric was fantastic and prompt with the service, getting from Canada to Australia in 11 days.

Overall I think they add a lot to the feel of the board and are well worth the investment. Full marks Eric.

For more details see  http://www.hotzmats.com/fields_main_page.html
Total contents of the three packs
Back of the fields showing the matted felt

More pictures after the break

Friday, August 31, 2012

Let's go camping!

A very quick post - tents. Hard to find in 10mm, so I made a master out of putty and foam, then made a silicone mould and cast a few in resin. Not the best casts but serviceable until I get some more time. These will be used as scenics to represent camps or objectives in scenarios. The can also be used as fillers in the Artillery parks.

In other news I am working on a large number of Artillery pieces and crews, hence the distractions of Artillery park scenics. Getting the number of guns up for both the French and Allies is the current target.

Tuesday, August 28, 2012

Leave your baggage behind

Long road to war.
In the Napoleonic wars there was a considerable logistical effort when moving hundreds of thousands of men. Even the French, who "lived off the land" and foraged as they went, had a considerable collection of wagons and stock following behind. Generally baggage trains were out of the way of the battle, but can play a interesting role in scenarios or campaigns. In the 1815 campaign, the wet Belgian tracks were gridlocked between battles. Part of the delay in British and Allied troops arriving at Quatre Bras were due to a baggage train jam.

In the larger scales (15mm and 28mm) baggage trains can be expensive to collect. In 10mm they are far more affordable. There are a few different options available. Old Glory, Pendraken and Irregular Miniatures.

These figures are Irregular Miniatures from Eureka, beautifully detailed. A loaded wagon and pack horse. They were undercoated brown, colours blocked in then magic washed. Only an hour or so after dinner one night. The marching soldiers were left over from previous units. They will join the Old Glory wagons I painted 18 months ago. I'll use them as fillers in the Artillery parks.


Tuesday, June 5, 2012

Quatre Bras practice run

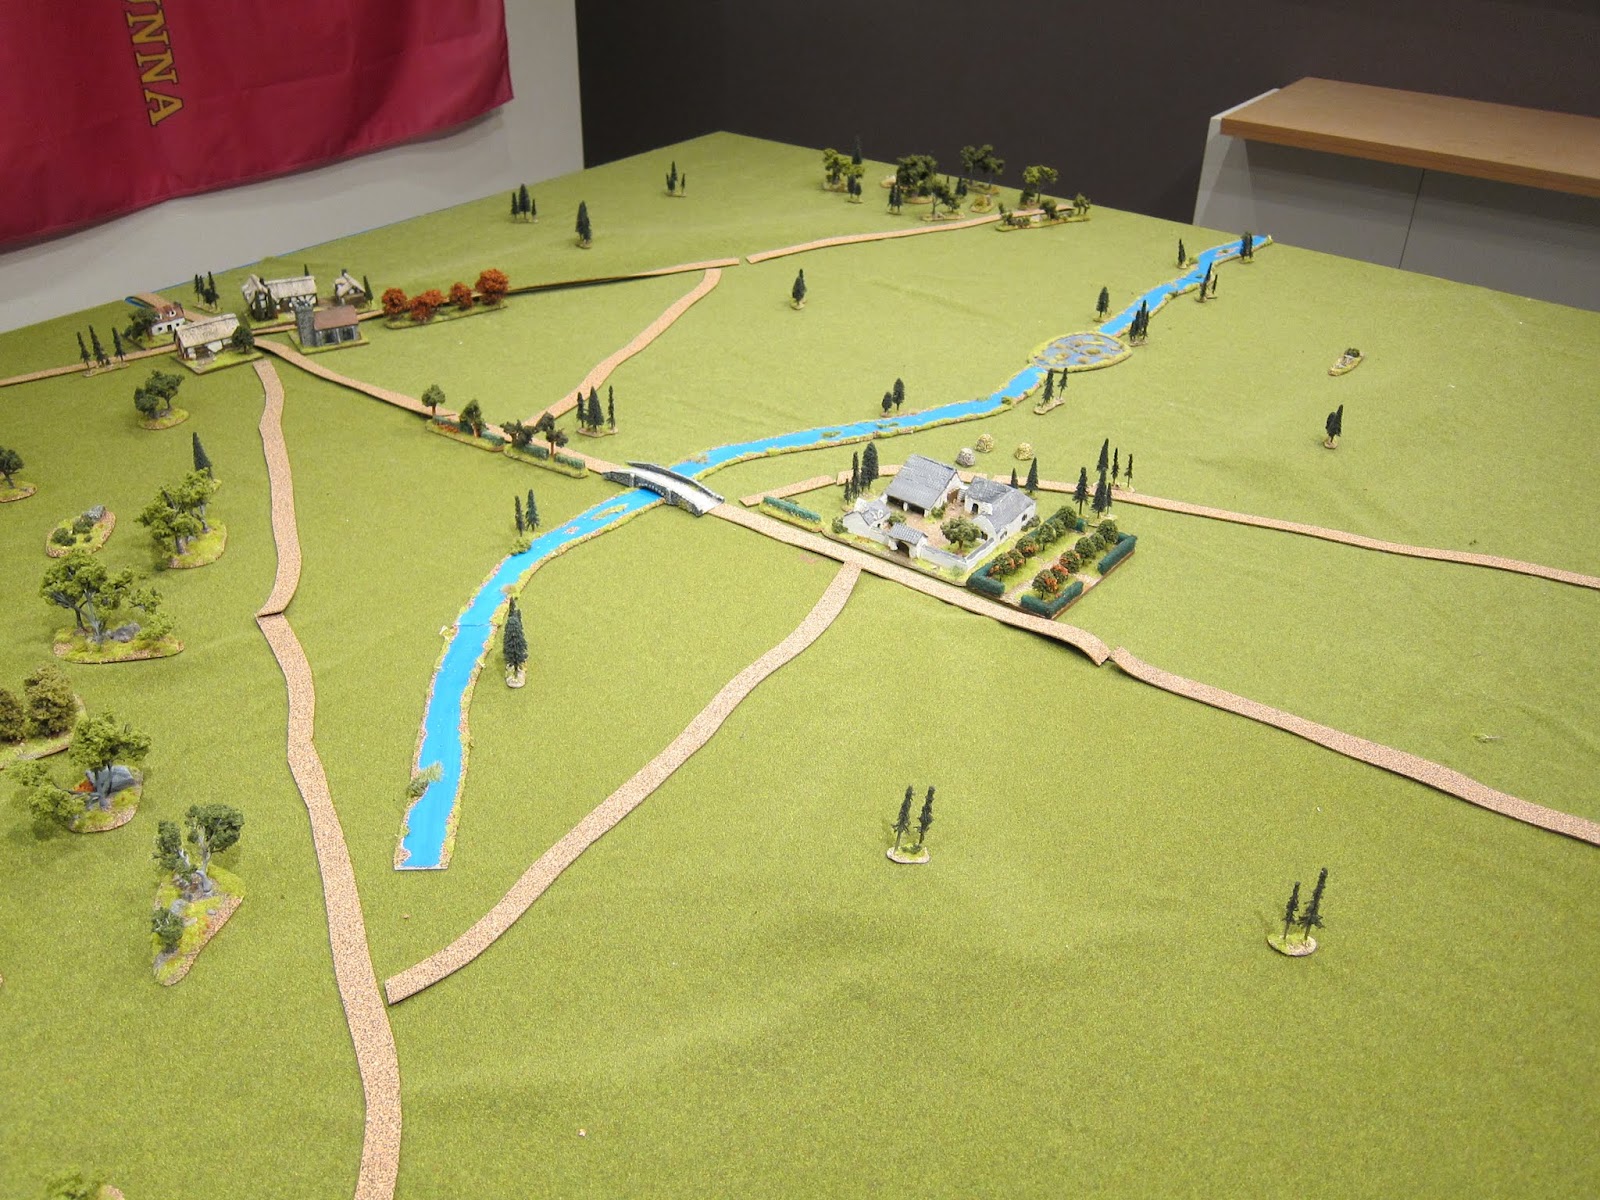
Overview of the battlefield. North is to the right of the photo
I thought being June I'd set up a practice game of the Battle of Quatre Bras. This is the battle I have been working towards on my 10mm project and it was a good opportunity to see how much progress has been made over the last 18 months. This is the first game in the newly redecorated War Room, a nice way to christen it.

There are obvious gaps in both the terrain and OOB, but where possible I'll use proxies. I might get a chance to finish some more units as I go. One of the big gaps is the leader bases - Prince of Orange, Reille, Ney, Division and Brigade commanders.

I'll be using "Republic to Empire" as the rules, and try out some scenario specific additions. As I am travelling a fair bit in the next month or so, this will be a multipart blog entry as I "slowly" play the game. It probably be a solo effort as I will be doing bits when I get a chance.

The terrain is mostly done. The Board is 8' x 6', which is almost enough. Bossu Wood came out well, it maybe needs to be a little denser, but the effect is there. The roads are temporary using gasket cork, they will need to improve. The creek is more like a river, again something to improve. I am undecided about the field placement, I'll do some more research before putting them on. Don't be surprised if they appear in later pictures. I'm not happy with the hills either - a rough layout, but need to do a closer match to the contours from the maps.
A view of Gemioncourt in the midground with Quatre Bras in the distance

Looking to the north east
The buildings of Quatre Bras seem ok. Gemioncourt needs to be redone, I am using a my version of La Haye Sainte as a proxy. Overall not too bad for a first attempt.

The starting troops for the Allies are from the 2nd Netherlands Division under Perponcher and the Prince of Orange. The first round of reinforcements at 2pm will be parts of Pictons Divison (done) and the Dutch Belgian Light Cavalry (which I need some proxies for). The rest of the later reinforcements I have done with the exception of the Hanoverian forces. I am waiting for some new Redline figures from Bend Sinister to get them done.

I have most of the French done. The starting troops are the 5th Infantry Division, II Corps cavalry, Guard Cavalry (Chasseurs a Cheval almost painted) and Guard Horse Artillery (not done yet, some Old Guard Foot Artillery as proxies). The next waves of forces are all done.

French initial deployment on the southern side
I'll draw up a schedule of reinforcements and OOB for the scenario. I was toying with a way of randomising who turned up when to create the confusion of the battle.

So ready to draw up the battle rosters, some initial admin then roll for initiative. What I really like about Quatre Bras is the build up nature of the game, it starts quite small then more and more troops are added to the fray.

I have bought a copy of the Piquet rules with some scenario cards and the Theatre of War Campaign supplement, with the idea of helping the solo play. I haven't really worked it out yet, but might use the scenario cards to simulate the fog of war element.

I've just noticed that the blog has collected over 25,000 views. A big thanks to all those who have read and commented, it has been a wonderful journey so far. 2015 is not too far off and progress seems good.

Quatre Bras to the North

Gemioncourt with Belgian Line and Dutch Militia
Nassau 28th Regiment and some Jaegers at the edge of Bossu Wood
2nd Nassau Regiment in Quatre Bras ready to move South

Thursday, April 12, 2012

Making Rivers

I cut the river shapes out of 3mm MDF, making sure the ends were about the same size - 30mm. I used a bandsaw, but a jigsaw works fine as well.

I then bevelled the sides with some sand paper, so they blend into the table. I then undercoated the MDF with some primer spray to seal the MDF.

Using some blue house paint, a sample pot I got at the local hardware store, I painted the blue middles of the pieces. Don't worry about the brush stokes, it looks like water flow. You could do more colours on top if you like.

I ran some white glue down each edge and sprinkled on the coloured ballast I use for basing figures. When that dries. I stuck on some long grass tufts for reeds, then some more white glue dabbed along the sides and put some flock on.

Lastly I stuck a bit of clump foliage for bushes.

Pretty quick to do and looks not too bad for 10mm. They will represent rivers 30mm wide in my games. I need to make up some junctions and maybe a ford or two. I will also make some narrower strips for creeks, maybe 15mm.
Painting the middle blue
Edges with coloured ballast
Some tufts for variety
Finished rivers showing flocking
Some of the different shapes