Tuesday, November 29, 2011

Dystopian Islands

Another small distraction. Some quick terrain for Dystopian Wars - islands and icebergs. I cut up some hard foam with the hot wire cutter I made. Undercoat with some house paint sample pots, two layers of drybrushing, a bit of flock and we're done.


Rough cuts with the hot wire cutter
Undercoating grey and brown

Icebergs in blue

Drybrush layer one

Drybrush on the icebergs

Finished islands with some flock

Finished icebergs

EOBS Squid going for lunch


Sunday, November 27, 2011

Hunt for Megashark

Completely off topic, but I couldn't resist sharing. My son has gotten interested in Dystopian Wars from Spartan Games. They have some fantastic little 1/1200th scale steampunk models. So we got some and started painting them up. I read in the Spartan Games Forum about a Megashark scenario and thought I would have a go a making a Megashark. I found a plastic model of a shark in the toy shop and started some surgery.


Toy shark before surgery 
First I cut it into 4 pieces - the head, tail, fin and belly. I used these parts to make 4 different models - swimming, diving attacking and dead. I screwed the plastic pieces to 3mm MDF base and used some air drying clay to texture the base with some splashes and waves. I also needed a little body work to fill out some missing bits of the shark. A little paint and all done.
Cutting into 4 pieces - very careful with a bandsaw

4 parts used to make the different stages

After screwing the parts to the bases, I used some air drying clay to make the waves and other bits

The clay is molded to have a missing head, no idea how this happened!

Finished parts before painting

All finished


That's a lot of Sushi
So, a scenario idea - The Empire of the Blazing Sun is down in the Southern Ocean looking for some whales (for purely scientific reasons), when they notice something big on the radar. This is a lot of sushi coming they think. Little do they know that the Covenant of Antartica has been doing some interesting experiments with Element 270 and some "fish". One of their pets is out on trial and heading for the EOBS  fleet. The fight is on ... Maybe some lost Prussians could help the EOBS. Anyway some options for some fun games and a Sunday afternoon.


He is getting away
Oh $@#&!!!!!

Carve him up lads
I'll need to make up some stats for the Megashark.

Oh and the inspiration for the scenario is the "classic" film - "Megashark vs Crocasaurus". Not a particularly good film for action, plot or special effects. Gotta find a plastic crocodile now.


Ok enough fun for now, back to painting heavy calvary.


Friday, November 18, 2011

Basing box


Found this at the local hardware store for $8. The compartments are 3.5" x 3.5" x 5", big enough to hold a lot of basing material - ballast, sand, static grass, flock, tufts.

It is also big enough to put the base with glue on in to be covered in whatever. The lid seals pretty well, but not sure if I would like to drop it though.

Keeps the clutter down on the desk.


Monday, November 14, 2011

Limber up


I have finished 12 French Line limbers today. I configured six with guns and six without. I now have enough limbers etc to cover all my current French Artillery in an artillery park. This is something I would never been able to do in 28mm. So far I have painted up 22 bases for the French artillery park
  • 12 Limbers
  • 6 Supply Wagons
  • 4 Forges
There are six French ammunition caissons left to do, probably after I make a few more batteries for them to support.


As part of "Republic to Empire" artillery has a limited ammunition supply. At the moment I represent this with some dice place next to the battery. I plan on making a scenic block that goes in between the limbers etc that will have a place for some 5mm dice to be slotted in. I'll decorate it with some various artillery accessories, probably make a mould and cast them in resin. They could be used by any nation.

Friday, November 11, 2011

Five things to be thankful for

I was reflecting the other day, on how things have changed in the thirty years since I started playing with "toy soldiers". Aside from my level of disposable income (vast improvement on a 10 year old's pocket money), on the surface there doesn't seem too much change. The figure lines are great (although there was no hard plastics back then). But when I started to think deeper, there have been a few thigs that have really changed the way I get immersed in the hobby. I've picked five things that I wish were around 30 years ago, it might have prevented a 25 year break!

1. Coloured spray undercoat (and "dip"). In the 80's I'd never heard of undercoating, let alone a coloured one. I couldn't do without it in 10mm. The pick of the bunch would be the leather brown spray. Perfect for calvary. The horse is almost done, and the uniform colours go fine over the brown. Brushing on a walnut coloured floor stain covers a multitude of slips and evens things out. I finish a lot more troops this way. I also like, blue, red, white, black and gray. The green is fantastic for priming French artillery pieces or rifles.

2. Acrylic Paint. I started with Humbrol enamel paints on bendy Airfix figures. I them moved on to Hinchliffe 25mm lead soldiers. They were great colours, but took a while to dry and used turps, which stank out my room and made a mess (maybe it was me who made a mess). The lids never fitted properly and the pots dried out if not sealed. I know there was some from Tamiya, but not near the quality and range we have now. Now, modern acrylics like Vajello and others provide vibrant colours, quick to dry and easy to clean up with water. I only started using a "wet palette" this year, which has saved lots of wasted paint. And dropper bottles - fantastic, less waste again.

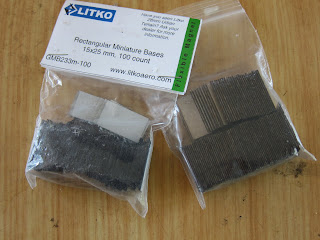
3. Precut bases. I used to spend hours cutting out bits of cardboard or finding thin enough bits of wood around to base my soldiers. What ended up was a hotch potch of sizes, styles and shapes. Now I can order thin plywood bases of exact and consistent sizes, with magnetic bottoms so they stick to the metal drawers of the storage box. Easy, consistent and more time for painting or playing. I mentioned in an earlier post about pre-coloured railway ballast. Now basing is only another 15 minutes after the paint has dried.

4. Silfor grass tufts - these are magic, a dob of white glue then place on a few tufts and the base is done. A long way from the dyed sawdust I stuck on bits of cardboard. The realism and variety of colours make any base look fantastic.

5. The Internet - ok the best until last. The old days of looking at catalogues, getting a money order, writing away for an order, waiting every day for a month for it to get back - gone. Think of something, a few clicks later its being packed and sent to you. Uniform research, no longer lurking in the library or trying to find the right Osprey book. Again, a few clicks, and everything there. OOB's, tutorials, scenarios, inspiring blogs, wargames news sites, manufacturers previews, historical research and debate, forums with helpful members are all only a few searches away. I am really spoilt for choice.


Thinking back those years, they were formative ones, developing skills, an interest in history and strategy, studying famous generals and battles. Yes it is easier now, but I wouldn't change the past. I do give thanks to the new innovations of today (and that disposable income).

One last thought ...


What would you rate as your top five?


Wednesday, November 9, 2011

New hills


I made some very simple hills to put under the game mats. The replace the old square blocks or books under the cloth. I cut out various long ridge lines from 16mm MDF, then bevelled the edges  so the figures stand better on them. Nothing really difficult here but a slight improvement on what I had before.

One day I'll make some proper terrain boards.


Sunday, November 6, 2011

Getting the Union Brigade together


How do we stop this thing?
Heavy cavalry has been missing from my current forces. I've started with the Union Brigade from Uxbridge's Reserve Cavalry Corps. Its made up of the 1st Dragoons (English), 2nd Dragoons (Scot's Greys) and the 6th Dragoons ("Inskillings" Irish), hence the "union".  They achieved a bit of notoriety at Waterloo with an out of control charge. I supposed they got a bit carried away. They were not present at Quatre Bras but I thought they would be a good addition to the Allied forces.

I've painted the Scots Greys and the Inskillings, 24 of each.

The figures are from the Redline range, dead easy to paint, and well proportioned. The new black "magic wash" did a great job on the Grey's horses. Undercoated white, painted the horse tack brown, coloured a few manes and tails black and grey, then a wash.

Scotland Forever!
Just need the 1st Dragoons and Ponsonby's brigade is finished. Maybe find a figure for Ponsonby himself.

Two regiments of French Cuirassiers are next to match them.

More pictures below.