Saturday, December 31, 2011

Last unit for the year

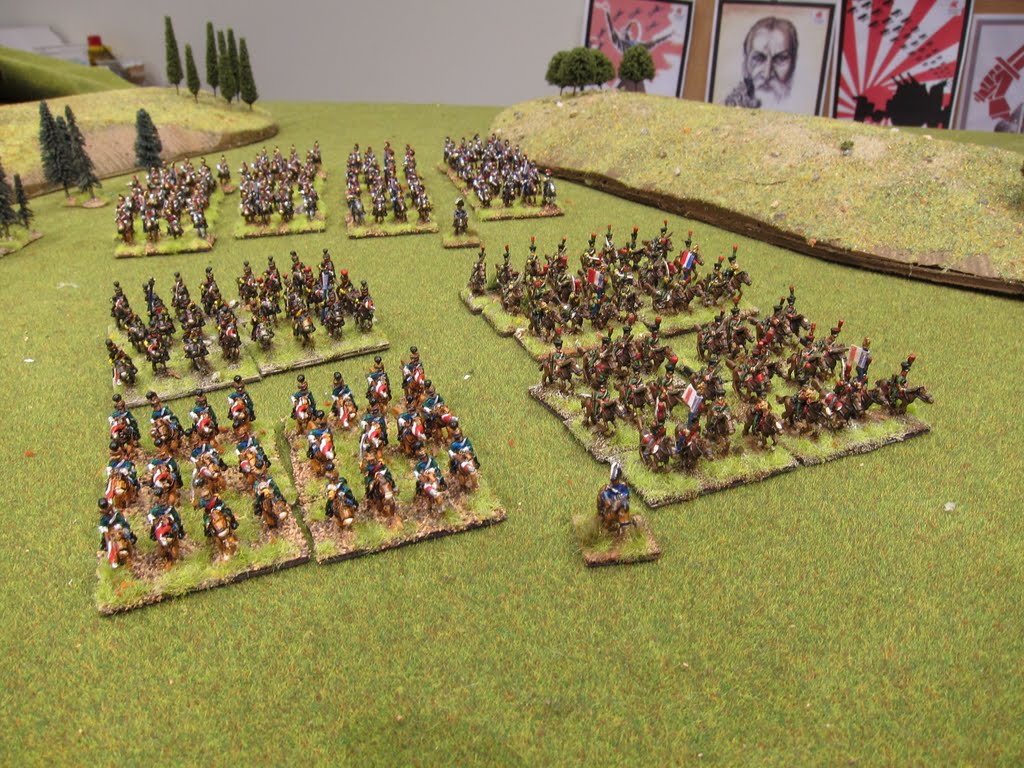
I thought I would do something special for my last painting day of the year - Grenadiers a Cheval - "The Gods". These were the most elite unit of the Imperial Guard Cavalry, big men on big black horses.

They were selected from the bravest men from the Heavy Cavalry with at least 10 years service and 4 campaigns. Napoleon was reluctant to commit this regiment to battle.

They were a bit of an indulgence for me to paint, not being in the plan for Quatre Bras, but were involved in Waterloo. They join the Emperor's "beautiful daughters" - 12lb Old Guard Foot Artillery as my only Imperial Guard regiments so far.

Great castings from the Redline range, very quick to paint with a black undercoat (horses, horse tack, boots and bearskin done already), dark grey dry brush, then blue, white, red, silver and lots of gold.

Happy New Year.


Thursday, December 29, 2011

2011 in Review

French Cavalry
2011 marked the start of my 10mm Napoleonics project, and this blog. The aim was to work towards playing the 100 days campaign in 2015 for the 200th anniversary. After a false start last year in 28mm, when I realised I would never get it finished alone, I switched scales to 10mm.

What an amazing journey it has been. My productivity and enjoyment has gone through the roof - I can usually knock off a battalion in an evening, or prep a unit before work. And while I had a few breaks during the year, I got a respectable total finished in the end.

There were lots of things I discovered along the way - precut bases, coloured undercoat, magic wash, speed basing ideas, casting with resin. I've had to scratch build a number of scenics, try some conversions, and think hard about how to fill in missing figure lines. I learn alot also about the OOBS and the battles themselves in researching uniforms.

Brunswick Corps
Highlights would be finishing the Brunswick Corps, British Rockets, French Heavy Cavalry Division and seeing them all on a table. Writing this blog was certainly a highlight and a motivator to keep things moving. I am grateful for the comments and suggestions along the way. Over 13,500 visits since I started in February, which is amazing.

A huge thanks to the manufacturers out there for making awesome products. I especially want to thank Si from Bend Sinister for his support, flexibility and openness to suggestions. I know he does it as a labour of love, and you can see it in the quality of his figures. I can't wait to see the new releases he has planned for next year. Hopefully over the next few years he will get the gaps in his range finished in time for the 200th Anniversary pf 1815.
French Drawer

So the painted tallies for 2011 :

Infantry - 958 men
Cavalry - 396 men
Artillery -193 men
Guns - 53
Limbers - 35
Leaders - 35
Casualties - 24
Terrain - too much

I am a firm believer in the Wargamers superstition - "when there is no lead to paint, you die". So I have ensure I have plenty to last me 50 more years (thanks Si). Hopefully 2012 will be just as productive if not a little more.

A full breakdown of what I painted after the break.

Friday, December 23, 2011

Pire's 2nd Light Cavalry Division

I finished the 5th Lancers which were the last part of Pire's Light Cavalry Divison at Quatre Bras and Waterloo. They played an crucial role in fighting the British 1st Guards Division in the Bossu Woods. At Waterloo they guarded the French left flank and supported attacks on Hougoumont.

Count Pire's Division is made up of  -

1st Brigade General de Brigade Baron Hubert
    1st Chasseurs a Cheval Regiment
    6th Chasseurs a Cheval Regiment

2nd Brigade General de Brigade Wathier
    5th Lancer Regiment
    6th Lancer Regiment

Again Redline figures - the Lancers are a little bigger in proportion the the Chasseurs. They come in a number of poses to give variety to the line. The 6th Lancers were first Redline figures I painted at the beginning of the year, and the 5th almost the last figures I painted for the year. It's been an interesting journey in between - lots of figures painted, a lot of things learnt.


2nd Cavalry Division with the 11th Cavalry Division in the back

Tuesday, December 20, 2011

Casualty Markers

Infantry casualty marker - Redline figures
One of the challenges in 10mm is accounting for casualties. Because they are based in larger numbers, individual removal is problematic. Because I have lots of units on the table, a paper based one would be confusing, and a computer based one. So a marker is necessary.

In the "Republic to Empire" rules casualties are only removed after half the unit is gone. This represents the "thinning" of the line while losing effectiveness. Regrouping after heavy losses would result in smaller frontages. So I need to make a counter up to around 12 which represents two stands of infantry or 3 of cavalry.

There are a number of commercially available dials and counters. Litko make a nice laser cut one in coloured plastic. They were a bit expensive ($5.99 for 2) and the nice plastic would stand out on the table too much. They were also a bit thick.

Home made dial sheet and Jim's goodies
The Dial Dude had some funky looking ones with flags, a bit cheaper. But he seems to be not making them at the moment and not answering emails.

So I thought I'd make some. I wanted them to blend into the table, but still be noticeable on what they were recording.

I talked to Jim at Litko about his flexible steel and flexible magnetic bases. They were not rigid enough by themselves so I needed to get a .8mm plywood top on them. I thought I could have the plywood and flexible steel on the top and the magnet on the bottom. Unfortunately the magnet sticks on one side, the side without the adhesive, so I have had to glue the paper dial on the magnetic side. I ordered 100 30mm circles in the plywood, flexible steel and flexible magnet ($46 plus shipping - much better).
Parts waiting to come together. The magnetic sheet is already stuck to the plywood

For the dials I made up a sheet using Inkscape, a free vector drawing program. I wanted to use a vector program as the numbers would render better as I bent them round the circle. And I needed an accurate way of printing 30mm circles easily.


If anyone wants the files you can download an .svg vector file or a .pdf version. The dials go from 1 to 12. Feel free to modify them as you need. They are a clone tiled, so by changing the top left one, the others should all change.


I then cut a wedge out of the plywood/steel combination with a chisel. Be careful of which way the grain goes as it may split if you cut along the grain. It is assembled from top to bottom -

plywood
paper dial
magnetic sheet
steel sheet

The flexible steel base keeps is together. The wedge needed to be big enough to only show one number, including the 10 11 and 12, without showing any others.
Assembled dial


Redlines outstanding little casualty vignette. 
Now for the scenic treatment. Not a lot of options in the 10mm casualty range. Which is a shame, it is these little details which really appeal to the wargamer, especially when it helps with the game play and atmosphere.


Redline has some fantastic little two person scenes of a soldier holding his dying mate. The figures are "generic" in that they are bare headed (I managed to get one with a stovepipe shako somehow?) and have a simple uniform with crossed belts. I undercoated them red and blue, then painted the up as British and French Line. Maybe I should have done one with one of each showing a little compassion across the field. They are exquisite little figures that really come up well when painted. Hopefully the photo is clear enough to see them. They are not listed in Bend Sinister's shop. Si normally pops a couple in when you have a decent order. I've collected 9 so far. I'll have to ask him to put them in the shop.

Pendraken's dead horse marker from the Napoleonic range.
Pendraken have a dead horse in their Napoleonic range. Unfortunately there are no pictures. I know it is a hassle putting pictures in online shops, but it makes a big difference to customers when they can see what they are ordering. They come in packets of 5 for a a few dollars. Good value really. Nice figure, lying down with I think a British type saddle. It would be nice to have a couple of saddle variants, but I imagine they aren't a big seller.

A bit of flock, tufts and rocks and all done.  The dials just stick together with the magnet and can easily be moved around. I plan on making one per regiment, so they can be discreetly placed on the table.

I am thinking of maybe making some with morale status on them, or little artillery ones with ammunition counters.

If any 10mm manufacturers are reading this please make some more casualty figures and maybe even some ambulances or wagons for wounded. They are so affordable in 10mm to have them on the field. They really add to the game.

Dials glued to the magnetic bases - steel and plywood circles on the left
A morning's work


Monday, December 19, 2011

L'Heritiers 11th Heavy Cavalry Division

11th Calvary Division
Baron L'Heritier 11th Cavalry Division was part of Kellerman's II Cavalry Corps present at both Quatre Bras and Waterloo. At Quatre Bras the Dragoon Regiments were stationed South West of Frasnes and missed the action. The Cuirassiers charged the British 5th Division under Halkett and took the King's Colour of the 69th. The charged straight through the middle and ended up at the cross roads where they met close range artillery and musket fire, before retreating back.

At Waterloo, they were part of Ney's unsupported massed cavalry charges in the afternoon.

The 11th Division was made up of  -
1st Brigade of General de Brigade Picquet
    2nd Dragoon Regiment
    7th Dragoon Regiment

2nd Brigade of General de Brigade Guiton
    8th Cuirassier Regiment
    11th Cuirassier Regiment

It also had the 3rd Battery of the 2nd Horse Artillery under Captain Marcillac.

I used Bend Sinister's excellent Redline figures for the Dragoons and Cuirassiers. Really easy to paint and good proportions. They are in a full gallop with swords pointed forwards. The Redline Captains always have their swords high in the air for easy recognition. 96 figures representing approximately 1920 men.

I look forward to painting more Cuirassiers and I make up the other 9 Regiments present at Waterloo. Maybe later next year.

8th and 11th Cuirassiers 
2nd and 7th Dragoons

Sunday, December 18, 2011

New magic wash mix


Wash options
I have been playing around with some different options for magic wash or "dip". I used the Army Painter's Strong tone for a while, but the turps clean up and long drying time were a pain.

I then found some wood stain - Antique walnut. What was nice about this one was it was water based so was easier on the brushes and cleanup. The disadvantage was that it made the colours quite dark and made the whites very "muddy" in appearance. I tried lighter shades of colour before the stain, but couldn't fix the white. So I was painting over it after the wash, which was ok, but another step.

I read on numerous websites about using future acrylic floor wash. The challenge was finding it in Australia. Unfortunately it seems it is no longer sold here. But I found a substitute - Long Life self shining floor polish, made by Pascoe's. I found it in my local Woolworth's. It looks very milky, but apparently is the same stuff.

The recipe is equal parts water and floor polish, and colour with ink or paints (black or brown). Some people suggest adding some dishwashing spot remover, a teaspoon per jar. Not sure what it is supposed to do, I'll try it in the next batch.

So I block in the paints on the figures, let it dry, the a generous slopping of the wash over it and let it dry. It dries glossy, but puts a fantastic black lining in all the creases. The white don't get greyed out or muddied. You can matt varnish over it if you don't like the gloss to further protect the paint job.

Another option is to varnish before adding the wash to further protect the colours. I find that this wash doesn't darken the colours as much as my previous options. And it's very cheap.


Block painting before the wash is applied
 
After the new magic wash

Thursday, December 8, 2011

Airbrush joining the team

Just bought an airbrush and compressor for undercoating 10mm figures. While the coloured spray undercoat in a can is great, sometimes it obscures the detail if it goes on too thick. It is also a bit limited in the colours. I can now get more variety in the browns of the horses and other uniform undercoats - green, blue, red. If I paint the dominant colour as an undercoat, the painting process is greatly speed up.

It was a cheap unbranded Chinese airbrush from ebay, and the compressor was almost new, off someone from a local forum. The airbrush is a double action, gravity fed one. 3 Different tips and needles - not the most expensive parts but enough to learn on. I can imagine I'll get a couple more brushes that I can swap, once I know what I am doing.

The compressor is reasonably quiet, my music can drown it out! And chugs along, easily keeping up with the spraying. it dances around a bit on the desk, I'll probably put it on the flor when I get a space set up for it. I think I'll need to make a booth to limit the overspray. And make a turntable out of scrap to make it easier to spray groups of figures.

I did some practice spraying on my Covenant of Antartica Dystopian War Fleet. A blue undercoat (not with the airbrush, but some left over primer) then airbrush white stripes on it. I picked out the weapons and pipes in silver, a bit of flouro green for the energy drive bits, then magic washed them for a finish. Not to bad for an evening's painting. A nice naval camouflage. I didn't want to spent too much time on this little diversion, I have hundreds of 10mms to get though yet.

The air brush will take some getting used to, but I can see its value already.